
Last updated: November 12, 2026
Key Takeaways
- Acrylic shower pans need full base support, not isolated hard spots.
- Make the subfloor clean, flat, dry, and stiff before any mortar goes down.
- Use type S mortar under the pan unless the manufacturer says otherwise.
- Dry-fit, set, and check level before the mortar firms up.
An acrylic shower pan that rocks, squeaks, or sits out of level needs mortar support, not extra screws. This guide on How to Level and Support an Acrylic Shower Pan with Mortar shows how to bed the pan, level it, and avoid flex under the shower floor ribs.
What the mortar bed has to do under an acrylic shower pan
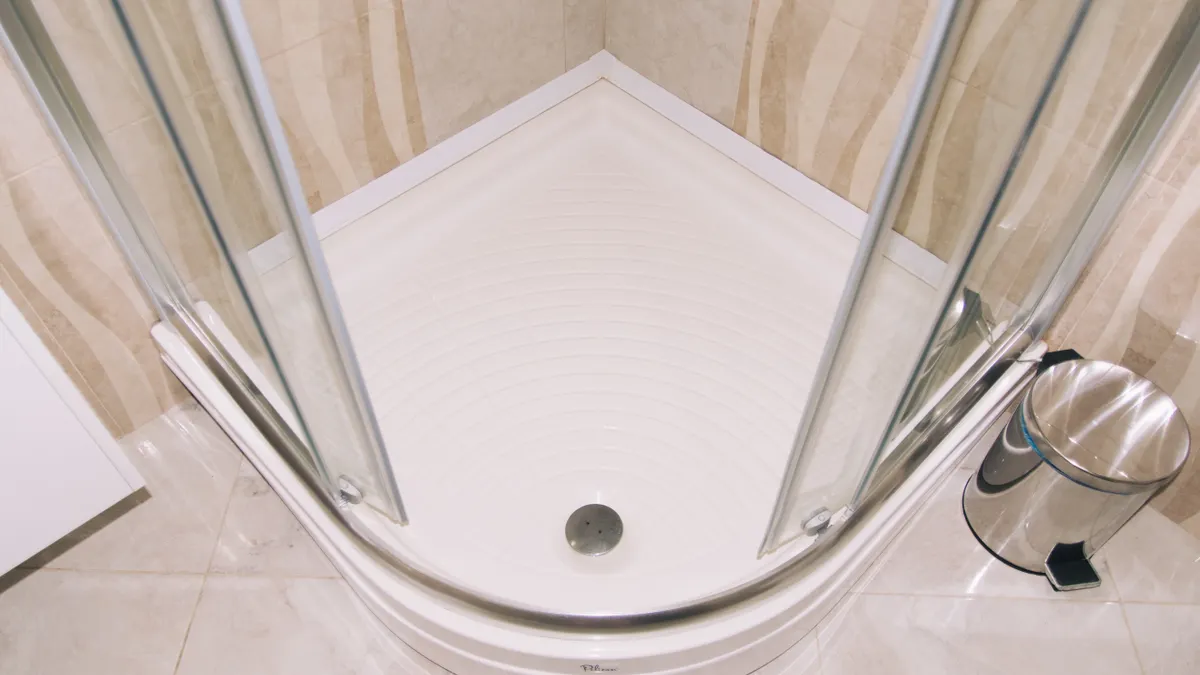
Acrylic shower pans need full, even support under the base, not a few hard spots. The mortar fills the gap between the subfloor and the shower floor ribs, which keeps the pan from flexing when someone steps into the shower.
Picture this: you have the pan in the alcove, the drain lines up, and one corner dips when you press it by hand. That dip will turn into movement, grout cracks, or a noisy floor if you leave it alone. Mortar solves the gap; leveling shims can help with the tilt while the bed cures.
The mortar is not there to glue the pan down. It is there to cradle the underside and spread the load across the whole footprint. A preformed acrylic base can sit on a flat, stiff subfloor and still need mortar because the molded ribs rarely match the floor perfectly.
Use the pan maker’s instructions first if they differ. If they call for a specific mortar type, follow that. If they only call for a setting bed, type S mortar is often used because it packs well and stays supportive after it cures, but the manufacturer’s instructions control the job.
- Mortar fills low spots.
- Shims can help hold level during cure if the instructions allow it.
- The pan must not rock.
- The drain must stay aligned.
How do I prepare the subfloor before setting the pan?
You prepare the subfloor by making it clean, flat, dry, and stiff before a single scoop of mortar goes down. Any soft panel, loose fastener, or floor squeak can telegraph right through an acrylic shower pan.
Picture this: you step on the bathroom floor and hear a squeak near the drain opening. That sound means movement in the subfloor, and movement under a shower base is trouble. Tighten the floor first, then set the pan. If the panel flexes now, mortar won’t fix that by itself.
Check the subfloor for loose screws and refasten seams. If the floor feels springy, add blocking or repair the panel before you move on. A pan that sits on a weak floor can still flex even when the mortar bed is perfect.
Use a level or straightedge across the opening so you know where the high and low spots are. You do not need a perfect dead-flat floor, but you do need a surface that lets the pan sit without twist. On many jobs, the best fix is a combination of subfloor repair and a modest mortar bed, though the exact repair depends on the floor and the pan.
- Remove dust and debris.
- Refasten loose subfloor panels.
- Stop squeaks before setting.
- Confirm the drain opening fits cleanly.
What kind of mortar do you put under a shower pan?
You put type S mortar under an acrylic shower pan unless the pan maker calls for something else. That mix gives the base a dense, packable bed that supports the molded underside without shrinking into a weak pad.
Picture this: you open the bag and pour too much water because you want the mix to spread easily. That is where a lot of failures start. A loose mix can slump after the pan is set, and then the base loses support where it matters most.
The mortar should be a thick, damp pack, not a pourable slurry. It should hold shape when you squeeze it and break apart cleanly when you tap it. If it looks like pancake batter, it is too wet. If it crumbles like dry sand, it is too dry. You want it closer to a sandcastle mix that stays together under pressure.
Acrylic pans do not need a thick concrete slab. They need a supportive bed under the ribs and the flat zones. Too much mortar can lift the pan too high and fight the drain alignment. Too little mortar leaves hollow spots that let the base flex.
- Use type S mortar unless instructions say otherwise.
- Mix to a stiff, packable consistency.
- Do not make it soupy.
- Do not leave voids under the ribs.
How to Level and Support an Acrylic Shower Pan with Mortar
You level and support an acrylic shower pan by dry-fitting it, laying a controlled mortar bed, setting the pan into it, and checking level before the mortar firms up. That process keeps the base supported and keeps the drain centered without forcing the pan into a twist.
Picture this: the mortar is ready, the drain waste is lined up, and you only get one clean chance to lower the pan. This is the part where patience pays off. Once the base lands in the bed, you should move it only enough to seat it fully.
Here’s the catch: leveling shims are temporary helpers, not permanent supports. If a corner needs a shim to keep the pan at level while the mortar cures, that can be acceptable when the manufacturer allows it. If you need stacks of shims or wedges, the floor needs more correction before you set anything, and a professional installer may need to review the base.
-
Dry-fit the pan in the opening.
Check the drain location, wall clearance, and how the flange lands against the studs. The pan should sit in place without forcing it sideways. -
Mark the floor area.
Trace the footprint so you know where the mortar bed belongs. Keep the bed inside the pan’s support zone, not out near the lip. -
Mix the mortar stiff.
Aim for a packable blend that holds ridges and does not run. A weak mix can settle after the pan is set. -
Spread the mortar in mounds or a continuous bed.
Place enough material to support the shower floor ribs and the flat base zones. The finished bed should give full contact, not spot support. -
Set the polyethylene sheet over the mortar if required by your method.
The polyethylene sheet acts as a slip layer and moisture barrier between the mortar and the pan during some installations. Use it where your method calls for it, not as a guess. -
Lower the pan slowly and press it into place.
Stand in the center or apply even hand pressure as allowed by the pan design. The base should settle without a hard rock or spring. -
Check level across both directions.
Use a 2-foot level, then recheck the drain area and corners. Small adjustments are fine while the mortar is still workable. -
Add shims only if the pan needs temporary hold.
Use them at the flange or support points recommended by the manufacturer. Remove or leave them only if the instructions allow it. -
Let the mortar cure before loading the base.
Do not step in and out of the shower base while it is still moving. Give it the cure time the mortar bag and pan instructions call for, and consult a professional if the base still shifts.
A good set pan feels dead underfoot. It should not bounce or show hollow spots. It should not rattle at the drain.
Do you need a polyethylene sheet under the mortar?
You need a polyethylene sheet only when the installation method or pan instructions call for a slip sheet or moisture barrier. It keeps fresh mortar from bonding hard to the pan and can help the base seat evenly during cure.
Picture this: you have a bed of mortar ready and you are unsure whether to lay plastic over it first. The answer depends on the pan design and the manufacturer’s method, but the concept is simple. The plastic lets the base ride on the mortar instead of grabbing it too fast.
Some installs use sheet plastic directly over the mortar bed, then the pan is pressed into place on top of it. Other systems want the mortar to contact the underside more directly. That is why the instructions matter here. The wrong layer stack can change how the pan settles and can affect support under the ribs.
Do not confuse the plastic slip sheet with underlayment used for tile. This is a setting aid for the shower base. If the pan maker specifies polyethylene, use clean sheet material without wrinkles or trash under it.
- Use plastic only as specified.
- Keep the sheet flat.
- Do not trap debris under it.
- Follow the pan instructions on both the mortar and the barrier.
Common mistakes that cause flex, squeaks, and bad drains
The most common mistake is setting an acrylic shower pan on too little mortar. That leaves voids under the base, so the pan bends when weight lands near the drain or at a corner.
Picture this: the pan seems fine on day one, but six months later you hear a creak every time someone steps in. That is usually a support problem, not a cosmetic one. The base is moving against the floor or the mortar bed has a hollow spot.
Another mistake is using too much water in the mix. Wet mortar can slump after the pan is placed, and then the support point disappears. Another is relying on shims alone. Shims can level the base for the moment, but they do not provide broad support across the underside.
A third mistake is ignoring the subfloor. If the floor squeaks now, it will still squeak later, only louder after the shower base magnifies the movement. Fasten the floor tight before the pan goes in.
- Too little mortar: flex and hollow spots.
- Too wet mortar: slump and lost support.
- Shims only: point loading and noise.
- Weak subfloor: ongoing movement.
The best fix is boring: solid subfloor, stiff mortar, full support, and a level set before cure.
How to know the pan is set right before the mortar cures
You know the pan is set right when it sits level, does not rock, and stays fully supported without hard pressure points. That check takes only a few minutes and saves a lot of tear-out later.
Picture this: you step on the pan edge and feel a little click or bounce. Stop there. A properly bedded acrylic shower pan should feel calm underfoot, with the drain area and corners resting evenly.
Check the level front to back and side to side with a 2-foot level. Then press gently near the corners and around the drain. If you hear a hollow sound or feel movement, the base is not fully seated. You may still have a short window to correct it before the mortar sets.
Look at the flange too. It should sit as the pan maker intended, usually against the wall framing or blocking. If the flange is twisted or pulled away, the pan may be forced out of position. That can lead to wallboard problems later, even if the floor itself looks fine.
Support matters most at the load points: center, drain, and front edge. If those points feel solid and the pan stays true, the set is on track.
FAQ
What kind of mortar do you put under a shower pan?
Use type S mortar unless the shower pan manufacturer says to use a different setting material. The mix should be stiff and packable, not runny, so it can support the shower floor ribs and keep the base from flexing. If the instructions call for a specific bedding method, follow that over any generic advice.
Do you have to put mortar under a preformed shower base?
In most cases, yes, a preformed shower base needs mortar support under the bottom. The mortar fills gaps between the subfloor and the molded underside so the pan does not rock or flex. Some bases have special support systems, but plain shims alone usually do not give enough full-area support.
Acrylic shower pan installation rewards careful prep and punishes shortcuts. For the bigger replacement process, this fitting step belongs in the broader shower pan replacement guide, but the base itself must sit solid before anything else can go on top.
Drafted with AI; not yet reviewed by a person.

[…] Best Budget Pick: Acrylic shower pan — lightest, easiest to move, and simplest for many standard […]
[…] A common mistake is treating the recess like a patch job, so it is safer to treat it as a structural detail and consult a qualified professional when the framing is uncertain. You are building a structural subfloor drop that has to fit between existing floor joists, carry live load, and leave enough depth for a sloped shower pan. […]
[…] the broader swap process, pair this article with the main shower pan replacement guide so the drain work and the base work stay in […]
[…] How to Level and Support an Acrylic Shower Pan with Mortar […]