
Last updated: November 16, 2026
Quick Answer: One rear-wall access opening is often enough to replace a shower valve without cutting the front tile. This guide explains How to Replace a Shower Valve Without Cutting Front Tile by reaching the shower mixing valve from behind, not through the finished tile wall. That keeps the front surface intact, but it only works when the plumbing layout and wall depth give enough room to move.
Key takeaways
- Rear access is the cleanest way to protect tile, especially on custom tile walls.
- The job usually starts in the closet, hallway, or room behind the shower, not at the shower itself.
- An access panel is better than a random hole because it can stay serviceable for future repairs.
- The valve type matters: soldered copper, PEX crimp ring, and mixed-material runs need different methods.
- A remodel cover plate can hide small wall scars, but it does not solve a valve that has to be moved deeper.
- If the wall is packed tight, the valve cannot simply be “pulled out” without checking the piping layout first.
Can the shower valve come out from the back?
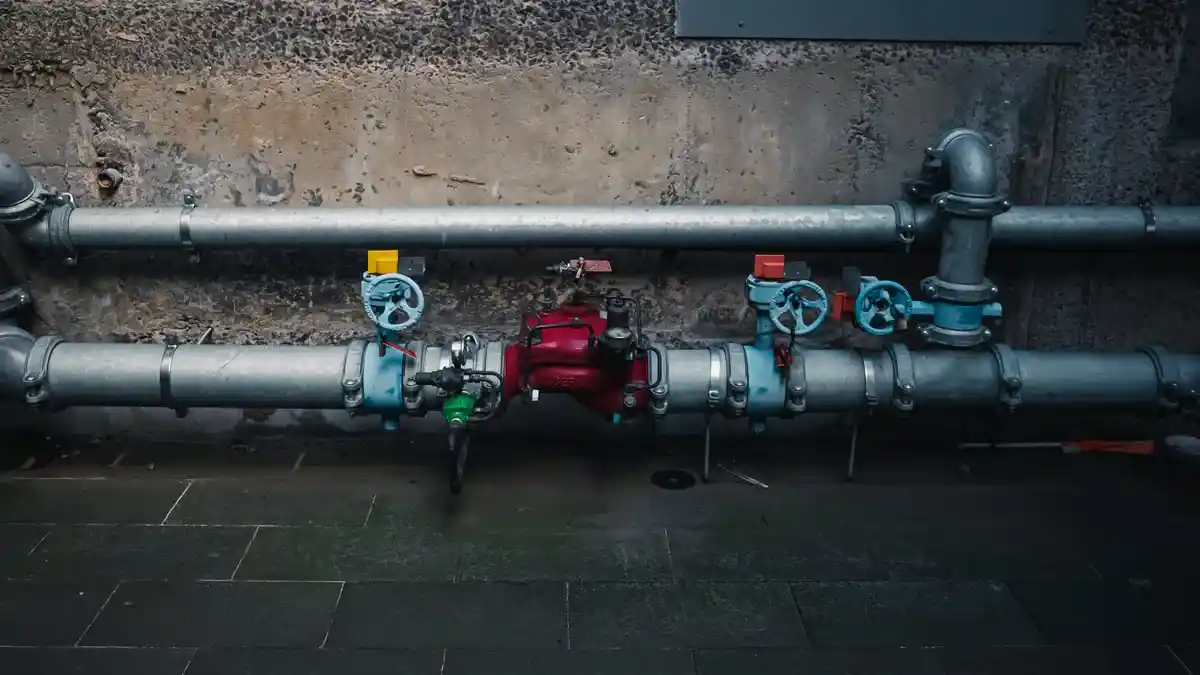
Yes, the shower valve can come out from the back only if the rear wall gives enough working room and the piping can be disconnected without disturbing the front tile. That is the whole point of this method. A standard tiled shower wall often hides the valve body, a plaster ground, and the finished trim, so the back side is the safer place to open.
The first question is not “How do I change the valve?” It is “What is behind the wall?” If the backside is a closet, utility space, or adjacent room with drywall, the project may be straightforward. If the backside is masonry, another tiled shower, or a finished wall with no spare cavity, the repair becomes far less friendly.
A rear-access replacement is best for a valve that still has serviceable pipe runs and enough slack to remove fittings. It is not the right move when the valve body is cracked inside the wall, when the supply lines are buried too tightly, or when the shower was built with no practical cavity behind it. In those cases, forcing the job through the rear wall can create more damage than cutting the front tile would have.
This approach is also a good fit for readers trying to preserve a finished tile job that is expensive or hard to match. It is not a magic fix for every shower. The price of avoiding front-tile work is usually extra labor behind the wall, careful planning, and a willingness to patch drywall or install an access panel afterward.
What tools and parts do I need?
You need the right valve parts, the right pipe method, and a way to close the wall back up cleanly. The exact list depends on whether the shower uses copper pipe or PEX crimp ring connections, and whether the new valve body matches the old one’s layout.
A practical parts list usually includes the new mixing valve, an escutcheon plate, replacement trim if the old one will not fit, drywall for the rear wall, patch screws, and the means to reconnect the piping. If the new valve is a remodel cover plate style, that plate can hide a larger opening around the valve stem on the front side, but it does not replace correct rough-in depth.
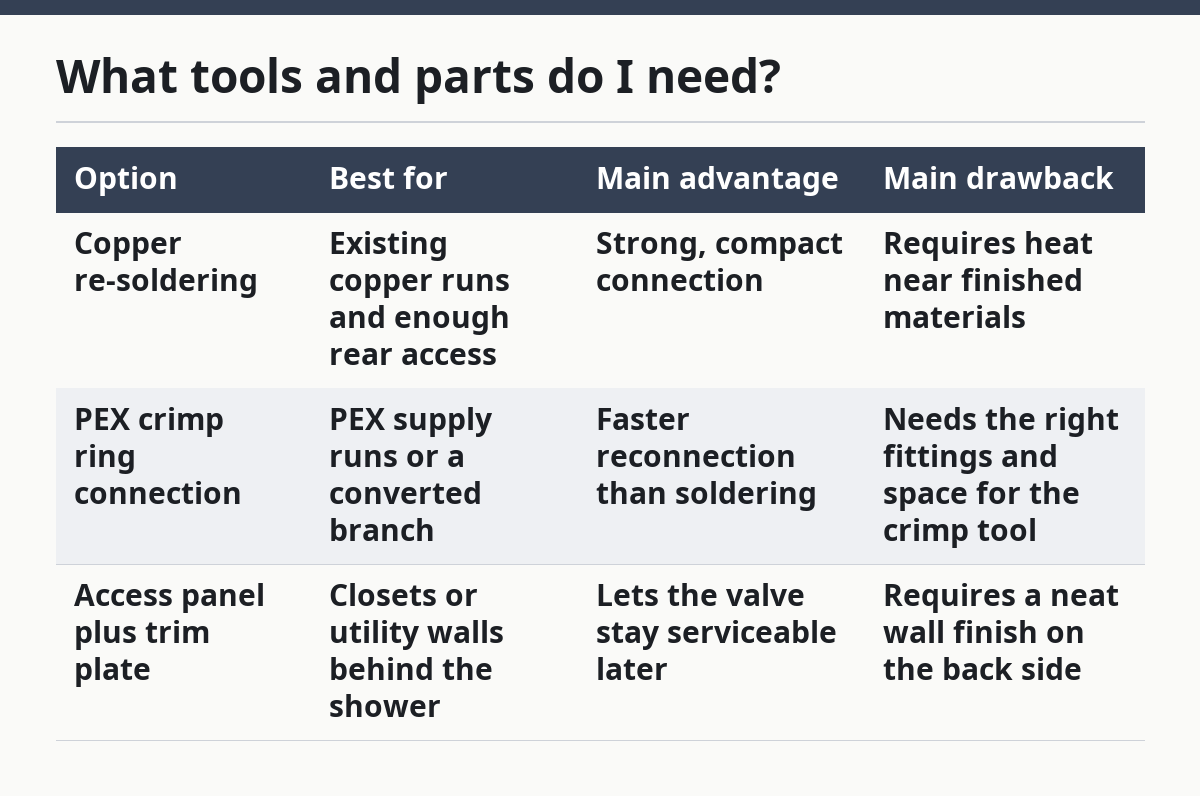
| Option | Best for | Main advantage | Main drawback |
|---|---|---|---|
| Copper re-soldering | Existing copper runs and enough rear access | Strong, compact connection | Requires heat near finished materials |
| PEX crimp ring connection | PEX supply runs or a converted branch | Faster reconnection than soldering | Needs the right fittings and space for the crimp tool |
| Access panel plus trim plate | Closets or utility walls behind the shower | Lets the valve stay serviceable later | Requires a neat wall finish on the back side |
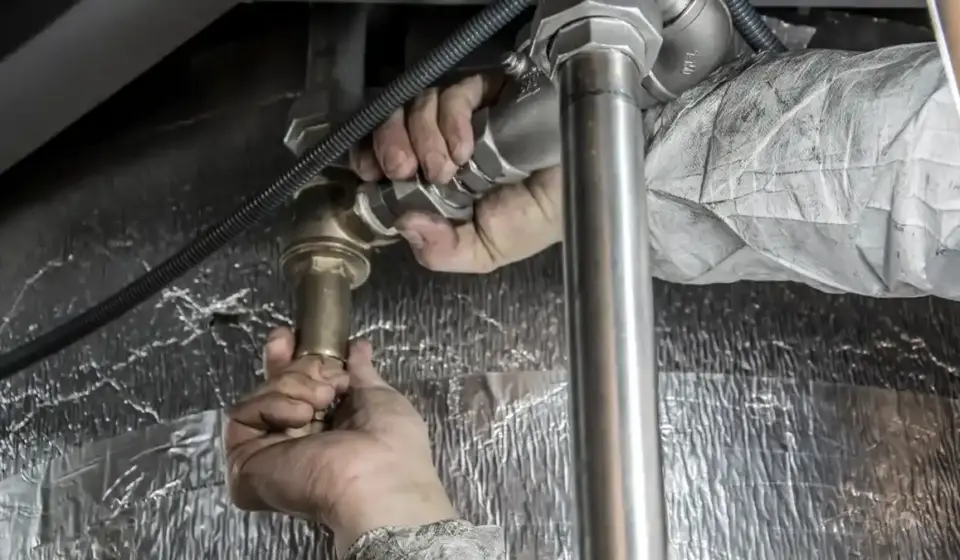
If the valve is a soldered copper setup, plan for a heat shield, a torch, flux, and time to cool before testing. If the valve is tied into PEX, keep the crimp rings and fittings matched to the pipe size already in the wall. A bad match here can turn a simple valve swap into a leak hunt.
The front side also matters. An escutcheon plate should cover the finished opening at the shower face without rubbing the handle or leaving a visible gap. If the valve depth changes, the trim may need adjustment before the wall is closed.
For code and manufacturer guidance on access and installation details, see the International Code Council and common valve installation manuals from major manufacturers such as Moen and Delta Faucet.
How do I open the wall from behind?
You open the wall from behind by finding the valve centerline, cutting only as much drywall as the job requires, and keeping the opening square enough to patch or frame into an access panel later. That means working from the rear wall, not from the tile face, and it means being deliberate.
-
Locate the valve position from the shower side. Use the trim plate and handle location as your guide, then transfer that point to the back wall. A stud finder helps, but the goal is the valve body, not just the studs.
-
Mark a controlled opening on the rear drywall. A neat rectangle is easier to patch than an uneven tear-out. Keep the cut large enough to reach the mixing valve, the pipe joints, and any shutoffs if they are present.
-
Cut the drywall carefully. Use a utility knife for the score line and a drywall saw for the deeper cut. Stop once the wall cavity is open and the valve body is visible.
-
Check the plumbing layout before touching a fitting. Look for copper pipe, PEX, or mixed transitions. This is where the job becomes either a soldering task or a crimping task.
-
Disconnect the valve connections. If the system is soldered copper, the joints usually need heat and care. If it is PEX, the crimp rings must be released by cutting back and replacing the affected section.
-
Remove the old valve body and compare it to the new one. The ports, depth, and orientation should line up before any permanent reconnection. The new body should sit where the trim can still reach it through the shower wall.
-
Install the new valve and test the fit with the escutcheon plate. The plate should cover the opening without forcing the valve deeper or leaving the handle crooked.
-
Close the rear wall with a patch or access panel. If future service matters, frame and trim the opening as a real access panel instead of burying the valve again.
The big rule is simple: do not cut more than needed. A panel that is too large makes patching harder, but a panel that is too small makes the valve impossible to service. The right opening gives enough space to work with two hands and a wrench, not just a finger and a flashlight.
Should I solder, crimp, or use a cover plate?
The most practical connection method depends on what is already in the wall and how much room the rear opening gives you. For copper, soldering behind drywall is possible, but it demands heat control and a clear path for the torch. For PEX, a PEX crimp ring connection is often cleaner because it avoids open flame, though it still needs the right tool and access.
Soldering behind drywall is the most delicate of the three. A flame near framing, insulation, or old paper backing is a serious risk to the wall cavity. If the copper run is too tight to protect, the better move is to open the wall a little more, shield the surroundings, and work slowly. A sloppy solder joint hidden in the wall can leak later and soak the backer board before anyone notices.
PEX is more forgiving on access, but only if the line can be cut, fitted, and crimped without kinking the pipe. A clean crimp ring connection should sit squarely on the fitting and leave the pipe straight enough for the valve body to sit true. If the pipe has no slack, the installation can tug the valve out of position.
A remodel cover plate solves a different problem. It hides oversized wall cuts around the shower trim, which helps when the rough opening behind the wall is larger than the visible trim opening. It does not fix bad valve depth, misaligned ports, or a pipe run that should have been rerouted. Use it as a finish piece, not as a repair.
What steps actually replace the valve?
The valve replacement works best when the old body comes out cleanly and the new one is aligned before the wall is closed. That keeps the front tile untouched and reduces the odds of a second round of cutting.
-
Shut off the water to the shower branch or the main supply. Open the shower handle to relieve pressure and let the line drain before disconnecting anything.
-
Remove the trim at the shower face. Take off the handle, trim screws, and the escutcheon plate so the valve stem is exposed.
-
Open the rear wall and expose the mixing valve. Keep the cut neat enough that the same opening can become an access panel later.
-
Disconnect the supply and outlet lines. Use the method that matches the piping: soldered copper joints get heated and separated, while PEX joints get cut back for new fittings.
-
Pull the old valve body free. Do not force it if a hidden bracket or pipe clip is still holding it. The body should come out without stressing the tile wall on the other side.
-
Set the new valve in place and check depth. The stem should line up with the finished wall so the trim fits without a gap or bind.
-
Reconnect the piping. For copper, make the solder joints clean and allow them to cool before turning water back on. For PEX, crimp the rings fully and keep the line straight.
-
Test for leaks before closing the wall. Run the shower valve, watch every joint, and look for drips for several minutes, not just a quick glance.
-
Patch the rear wall or install the access panel. If the valve may need service again, an access panel is the smarter finish. If not, patch the drywall and paint it cleanly.
-
Reinstall the shower trim and verify function. The handle should move smoothly, the water should shift properly, and the plaster ground or trim edge should not interfere with the escutcheon.
The hardest part is usually not the final trim. It is getting the valve body back at the right depth without shifting the piping. If the valve sits too deep, the handle and escutcheon may not cover the wall correctly. If it sits too proud, the trim may look wrong and the stem may bind.
What mistakes ruin the no-tile-cut method?
The biggest mistake is opening the back wall too small and then trying to work blind. That turns a manageable repair into a cramped teardown. A one-hand opening may look tidy, but it is not enough if the job needs soldering, pipe cutting, or valve alignment.
The second mistake is assuming the valve can be swapped without checking the pipe type. Copper and PEX do not behave the same way. A soldered copper line may need heat, while a PEX line needs the right crimp ring and fitting. Mixing those approaches without a plan can leave a joint that fails after the wall is closed.
The third mistake is ignoring valve depth. The new valve must sit where the shower trim expects it. If the body is mounted too far back, the handle may not install correctly, and a remodel cover plate may only hide the error rather than solve it.
A fourth mistake is treating the access opening like a one-time tear-out. If the wall behind the shower is drywall and remains serviceable, an access panel is often worth the extra framing around a 12-inch or similar patch area, even if the exact size depends on the valve and piping. If you are unsure how large to make the opening, consult a licensed plumber or building professional before closing the wall. The goal is future access, not just a hidden hole, and code-based access rules are covered in the ICC code library.
This is not the project for someone who wants a fast cosmetic fix with no plumbing judgment. If the valve is corroded, the pipes are rigid, or the backside wall is hard to reopen cleanly, the job becomes much less forgiving. The wrong opening can cost more time than simply planning the cut correctly the first time.
How does this fit into a full shower valve replacement guide?
This method is the rear-access branch of a broader shower valve replacement guide, and it matters because the front tile stays intact only when the backside is the work zone. That makes it different from a front-side replacement, where the visible wall gets opened and repaired.
The rear-access approach is the right choice when preserving tile matters more than preserving the drywall behind it. It is also the better choice when the plumbing can be reached through a closet or adjacent room and the finish side needs to stay untouched. It is not right when there is no workable cavity, when the valve is buried too deep for trim to reach, or when the piping layout cannot be reworked safely from behind.
If the shower has a standard mixing valve with accessible rear drywall, this is usually the cleanest path. If the wall is heavily packed, the piping is mixed, or the valve body needs a major relocation, another repair path may make more sense. That trade-off is the real answer behind the headline question.
For a broader walk-through of the whole project, the shower valve replacement guide on this site covers the larger sequence and helps place this rear-wall method in context.
Can you replace a shower valve without opening the tile?
Yes, if the valve can be reached from behind through drywall, a closet wall, or another service space. The front tile can stay untouched when the piping is accessible and the valve depth can be matched to the new trim.
This is not possible in every shower. If the backside wall is blocked, finished, or too shallow for tools, the tile may not be avoidable. The deciding factor is access, not preference.
How big of an access panel do you need for a shower valve?
The access panel needs to be large enough to reach the valve body, the pipe connections, and any fittings you must tighten or replace. A hand-sized opening is usually not enough if soldering or a PEX crimp ring tool is involved.
A better panel is one that gives room for both hands and leaves enough edge to frame the opening neatly. The exact size depends on the valve type, the wall cavity, and how deep the mixing valve sits behind the finished wall.
Drafted with AI; not yet reviewed by a person.

[…] in spray. The practical limit is usually not the handheld hardware; it is the combination of the shower valve, the 2.5 gpm fixture limit, and the pressure already available in the […]